Roasted garlic aioli is an emulsion of olive oil and garlic. It is a Mediterranean dip that goes with just about everything from fish to French fries to your favorite sandwich. Some versions use mayo, but this recipe is more traditional, so we’ll keep the mayo in the fridge and go Old Country with this.
The roasted garlic is a little modern break from tradition but is only serves to enhance the dish even more. And roasting garlic is super easy as you will see.
Roasted Garlic Aioli
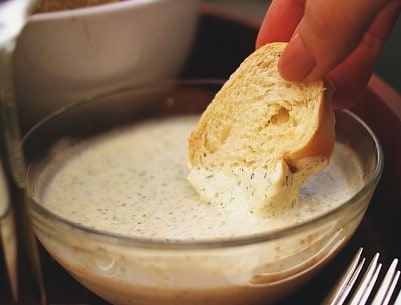
This garlic aioli recipe is easy and takes just 10 minutes prep time. It’s easy to pull together for an appetizer, or a wonderful addition to your breakfast, lunch, or dinner. It’s delicious as a dip with a chunk of bread. You can also use it to drizzle over eggs for breakfast or use it for brunch and serve it over vegetables such as asparagus or broccoli and cauliflower.
Use these step-by-step directions to make roasted garlic aioli. You may find you already have a lot of these ingredients in your refrigerator and pantry.
Roasting the garlic takes some time but it’s hands-off time — the oven does the work. I’ll usually make this dish first when I’m making garlic aoli for dinner. (I’m purposely using aoli and aioli because “aioli” — the right way — is unusual to spell! Many people spell it aoli garlic.)
I think this is the best garlic aioli recipe without mayonnaise there is.
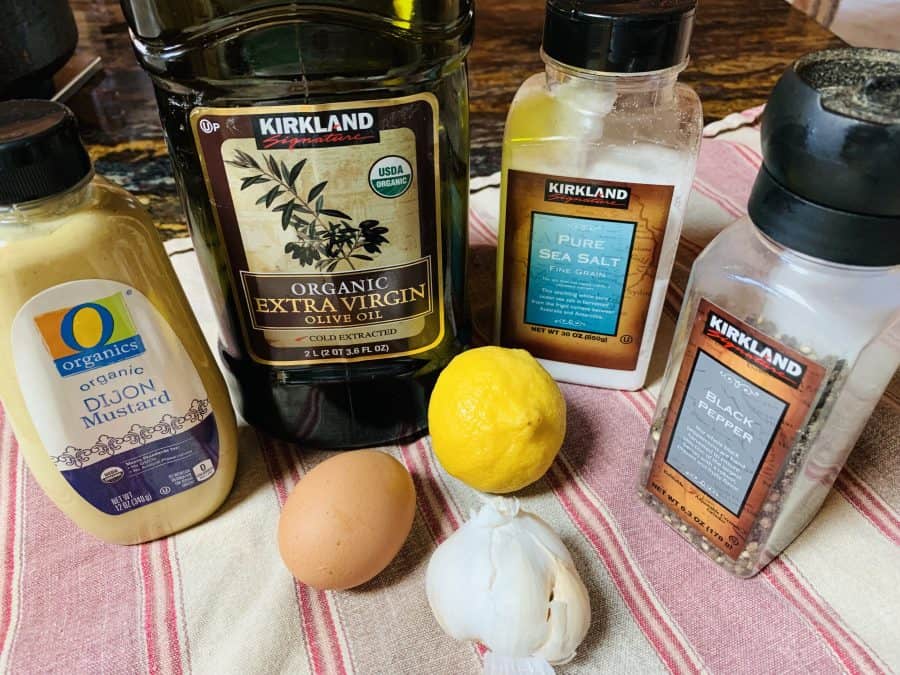
What You Need to Make This Recipe

- 1 small bulb garlic
- ½ cup olive oil
- 1 egg yolk (I only use organic eggs)
- Juice of ½ lemon (or to taste)
- ½ teaspoon Dijon mustard
- Sea salt to taste
- Coarse ground black pepper to taste
- Pinch ground cayenne pepper (optional)
Serves: 1 cup
Prep time: 10 minute
Cook time: 45 minutes
Note, there is raw egg in garlic aioli. If you wish to omit it, that is perfectly fine. If I am making this dip for my kids, I omit the raw egg.
I find it easy to buy two heads of garlic and double this recipe. I’m buying the lemon for this anyways, so in this way, I can use it up right away. It takes just as long to roast one head of garlic as it does two garlic heads.
Also, regarding the lemon, buy a real lemon, not lemon juice in a plastic lemon. Real, fresh lemon doesn’t list any ingredients — it’s simply lemon!
How to Make Garlic Aioli
- Roast the garlic. Slice the bottom tip off of the garlic bulb so that you can see the cloves. Drizzle some oil over the exposed part, sprinkle a little salt, and wrap in foil. Cook in the oven at 350 degrees F for 45 minutes or until the garlic is completely soft and golden in color.
-
Squeeze the garlic cloves out into a mixing bowl and mash them well. Set aside to cool.
-
Once the garlic has cooled, add the egg yolk and some of the lemon juice. Whisk until the mixture is smooth.
-
While whisking, slowly pour in the olive oil. Make sure you are constantly whisking the mixture vigorously and only add a little oil at a time – in drips. This keeps the ingredients from splitting.
-
As the ingredients are incorporated, add the Dijon mustard, salt, pepper, and cayenne (if using). You can gradually increase the olive oil from drips to a gentle stream, all the while continuing to whisk until you reach your desired texture.
-
Serve garlic aoli immediately or store in the refrigerator in a covered container.
How Long Will it Last?
It is best to serve aoili immediately after making it; however, it does keep well in the refrigerator. If you keep it in a sealed, airtight container, it should last up to 3 days safely.
What is Aioli?
Combine olive oil, garlic, egg, and salt, and you’ve made aioli. Oftentimes, people will add other ingredients to it as well.
Homemade aioli is delicious as a dip for bread. You can drizzle it on pasta. I’ll use it like I do hummus and guasacaca, topping it on salads and more. Aioli recipes use garlic.
Making Foods at Home
Whenever I roast garlic to make roasted garlic aioli, everyone shows up for dinner on time. Roasting it takes some of the edge off so my kids will eat it. Most kids love dips and spreads. This is an easy dip to make. My kids dip their pommes frites in it while my husband and I will use it to top baked potatoes. It is also delicious on seared tuna and on salmon.
Be aware of eating raw egg. There are certain populations who shouldn’t eat it. As an example, if my kids are going to eat it, I omit the egg. You can also make garlic aioli without egg. That’s what’s great about this recipe. It is very versatile.
Love cooking with garlic? Try this garlicky roasted salmon with cream sauce. Love dips and sauces? You will love this garlic butter and this pesto recipe. Yum!
Cooking at home gets easier the more you do it. So many dips use fresh ingredients, and they are way tastier and healthier when you make them yourself instead of relying on store-bought, premade versions with the added preservatives and chemical ingredients.
This dip is a true garlic lover’s dream. If you make this recipe for roasted garlic aioli, please leave a note in the Comments. I would love to hear how it went and what you served it with. If you ever made a garlic aioli sauce recipe before, let me know what was different about it. Do you like it with or without mayo?

Roasted Garlic Aioli ~ A New Take on a Traditional Recipe
Ingredients
- 1 small bulb garlic
- ½ cup olive oil
- 1 egg yolk
- Juice of ½ lemon or to taste
- ½ teaspoon Dijon mustard
- Sea salt to taste
- Coarse ground black pepper to taste
- Pinch ground cayenne pepper optional
Instructions
- To roast the garlic, slice the bottom tip off of the garlic bulb so you can see the cloves. Drizzle olive oil over the exposed part. Sprinkle salt and wrap in foil. Cook in the oven at 350 degrees F for 45 minutes or until the garlic is completely soft and golden in color.
- Squeeze the garlic cloves out into a mixing bowl. Mash them well. Set aside to cool. This should take about 10 minutes.
- Once the garlic has cooled, add egg yolk and some of the lemon juice. Whisk until the mixture is smooth.
- While whisking, slowly pour in the olive oil. Make sure you continue to whisk the mixture vigorously. Be sure to add just a little bit of oil at a time – in drips. This will keep the ingredients from splitting.
- As you continue whisking and the ingredients are incorporated, add the Dijon mustard, salt, pepper, and cayenne (if using). You can gradually increase the oil from drips to a gentle stream, all the while continuing to whisk until you reach your desired texture.
- Serve immediately, or store in the refrigerator in a covered container. It will last for up to 3 days in the fridge.

