

Once I gained confidence in baking from scratch, I started to make homemade chocolate chip waffles. I’m so glad I bought a waffle maker. I’ve made waffles 23 times with this recipe. They’ve always turned out crispy and fluffy — exactly like Belgian waffles should. You can make these Belgian waffles with or without chocolate chips.
Because my son can’t have palm oil, sleepovers at our house used to be a challenge. I didn’t know what to serve for breakfast. When he would sleep over at friends’ houses, the families usually served doughnuts. I couldn’t buy doughnuts because they all contain palm oil. I couldn’t do cereals, cinnamon rolls, or Pop-Tarts because they contain palm oil. (Not that any of these are healthy options.)
Keep reading for this easy chocolate chip waffles recipe. It’s all from scratch, and it requires yeast. Follow the steps in order (melt butter, heat water, add yeast) to maximize your time.
You can make this recipe using a regular waffle iron or a Belgian waffle maker.
Below I explain tips for how to make waffles crispy and how to store and reheat leftovers so they remain crisp. Toward the end, I discuss what waffle maker I use and the accessories I use with it to make them easier to make.
Chocolate Chip Waffles
Belgian waffles recipes have you separate the egg yolks from the egg whites. In this recipe, I don’t do that. To save time, I simply crack the eggs and whisk them. If you want to separate the eggs, you can use 3 yolks and 1 egg white instead of 4 eggs.
Use this list of ingredients, equipment needed, and step-by-step directions to make delicious chocolate chip Belgian waffles. They are crispy on the outside and moist on the inside. They break apart into fourths so nicely. If you have a square maker, they will turn out great too.
This recipe makes 10 – 11 big fluffy Belgian waffles. Kids and adults will love them.
After I bought a waffle maker, I learned how to make these easy chocolate chip waffles from scratch
Ingredients
- 1½ cups water – divide
- 2¼ teaspoon active dry yeast – one pack
- 3 cups all-purpose flour
- ¼ teaspoon salt
- 4 large eggs
- ⅓ cup granulated sugar
- 1 ½ cups whole milk
- 1 stick of butter – melted and cooled
- 2 teaspoons pure vanilla extract
- 2 teaspoons vegetable oil – I use avocado oil
- ⅛ teaspoon oil to grease waffle top and bottom of waffle irons; a bit more if you have a double maker
- ½ cup real chocolate chips
Optional topping ideas:
- Pure maple syrup
- Cup of sliced strawberries
- Homemade whipped cream
- Powdered sugar
Ingredient Notes
Yeast: I use Red Star Active Dry Yeast in the packets because they don’t contain extra ingredients like yeast in jars do.
Real butter: You can use salted or unsalted butter. If you use salted, you can omit the ¼ teaspoon salt.
Choose organic: When your budget allows, buy organic ingredients such as eggs, butter, whole milk, sugar, etc.
Vanilla extract: Use pure vanilla extract. Imitation vanilla typically contains palm oil derivatives.
Chocolate chips: Be sure to use real chocolate. To avoid palm oil, read labels. Don’t use white chocolate which contains palm oil.
I like using Ghirardelli Milk Chocolate Premium Baking Chips, Hershey’s Milk Chocolate Chips, and/or Enjoy Life Semi-Sweet Mini Chips. You can use all milk chocolate chips or do a combination of milk chocolate, semi-sweet, and/or dark chocolate chips.
Real maple syrup: Do not by pancake syrup with is different from real maple syrup. Check labels next time you go to the store to see the difference in ingredients. Pancake syrup contains loads of ingredients vs pure maple syrup which only contains maple syrup.
Optional whipped cream: Learn how to make whipped cream with this easy recipe. Store-bought whipped cream and whipped toppings contain palm oil.

Make this easy chocolate chip waffle recipe
Equipment and Tools
- Waffle iron or Belgian waffle maker
- Measuring cup (should come with waffle iron)
- Small bowl to melt butter in microwave or saucepan to melt on stovetop
- Measuring cup for water and yeast
- Food thermometer
- 1 large bowl for flour
- Mixing spoon and/or hand mixer
- 1 medium or large bowl for liquid ingredients
- Measuring spoons
- Brush to grease waffle iron
- Tongs to remove waffles
- Cooling racks
How to Make Chocolate Chip Waffles
- Melt butter in small dish, and set on counter
- Put half the water (6 oz) in microwave safe cup and microwave for 30 seconds or until water reaches 105 – 110°F (40 – 45°C). Measure with food thermometer.
- Add yeast to heated water. Add pinch of sugar. Gently stir, and set aside.
- In large bowl, add flour and salt. Stir and set aside.
- In a separate bowl, add the eggs and sugar. Pour in the yeast mixture which should be foamy. Stir to combine.
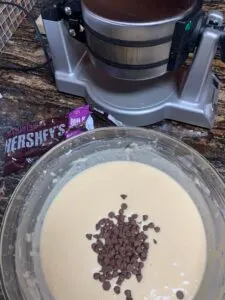
- In the bowl with the eggs, sugar, and yeast, add the remaining 6 oz of water, milk, oil, melted butter, vanilla extract, and chocolate chips, and combine until smooth.
- Pour the liquid mixture into the flour mixture. Combine until the batter is smooth.
- Let the batter rest for 60 minutes. Gently stir it every 15 minutes.
- After 45 – 50 minutes, turn on the waffle maker. I set my maker to setting #4.
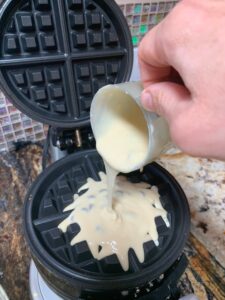
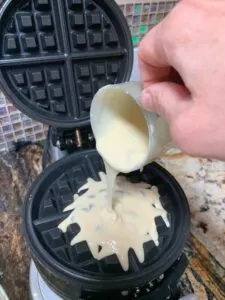
- When it’s preheated, pour just under a ⅛ teaspoon oil on the waffle iron, and use pastry brush to spread it around, coating the top and bottom irons. Repeat if you have a 2-iron waffle maker.
- Scoop ¾ cup of batter or use the scoop and fill to the line if your waffle maker came with one. Close the lid. If you have a second waffle iron, rotate the waffle maker 180°F and fill the other well with batter. Rotate the maker again 180°F so the one that was on the bottom is now on top.
- Wait until the indicator light beeps, and open the lid. With tongs gently remove the waffle and place on cooling rack.
- If you are serving waffles soon, preheat your oven to 200°F or on the Warm setting. Place waffles on a cookie sheet. Preferred: If you have a cooling rack, set it on the cookie sheet and set the waffles on them.
- Repeat steps 11 – 13 until all the batter is gone.
Notes
- You can add the chocolate chips before the batter rests or afterwards, just before making the waffles.
- The first waffles may not turn out as great as the rest of the waffles.
- Do not open the waffle maker to test for doneness. The indicator light will tell you when they are finished.
- Only touch the waffle maker handle, never anywhere else; it will be VERY HOT.
- You can make the batter ahead of time. Cover the waffle batter, and put it in the refrigerator overnight to make them the next day. Gently mix it before using.
Tips
- Pour the batter in the middle of the waffle iron so it spreads out evenly.
- I like how the waffles turn out when I set my waffle maker to the 4th setting. The waffles turn out nicely browned and crisp without being dark and overdone.
- Set freshly-made waffles on cooling rack so they stay crispy rather than stacking them so they don’t become moist and soggy.
- See storage tips below so they remain crisp.
- You can double the recipe and make one batch chocolate chip and the second blueberry. Or halve this recipe so you have approximately 5 – 6 waffles with chocolate chips and half with blueberries.
Topping Ideas
Belgian chocolate chip waffles are light, fluffy, crispy, and the right amount of sweet. Here are some topping ideas to enhance them further.
- Real maple syrup
- Melted butter
- Confectioners sugar
- Sliced strawberries, blueberries, raspberries
- Chocolate shavings
- Scoop of ice cream for a unique dessert
- Homemade whipped cream
- Honey
- Jam, jelly, preserves, marmalade
How to Store Waffles So They Stay Crispy
To refrigerate waffles:
- Set waffles on cooling rack after removing them from the waffle maker.
- Once they are completely cooled, stack them. Seal them in airtight container or with plastic wrap. Set in refrigerator for up to 5 days.
To freeze waffles:
- Be sure waffles are completely cooled.
- Stack them inside a gallon-sized plastic bag, putting a piece of parchment paper between each waffle.
- Remove excess air and seal the bag.
- THIS IS KEY: Depending on the type of freezer you have, place in the back of your freezer or the bottom of your freezer. You don’t want them to be on the door or near the top where the temperature will fluctuate.
- Instead of using a plastic bag, you can also stack the waffles, putting parchment between each one. Then seal completely with plastic wrap.
- You can freeze them for up to 3 months.
To Reheat Waffles
If you don’t serve the waffles right after making them, you can refrigerate or freeze them, and take them out when you are ready to serve them.
You can set them your oven on the Warm setting or 200 degrees F. Place waffles on a cookie sheet. Warm them in your preheated oven for 10 minutes or until ready to serve. Another option is to put them in the toaster oven. You can also warm them in the microwave for 10 seconds each, and then put them in a toaster.
I usually take the waffles right out of the freezer and warm them up without letting them thaw. This prevents them from becoming soggy.
How to Make Crispy Waffles
The biggest tip for making crispy chocolate chip waffles is to not let the just-off-the-waffle-iron waffle become moist. Setting freshly-baked waffles on a cooling rack with plenty of air around them will help them stay crispy.
To keep the moisture on the inside and a nice crispy outside, do not stack hot waffles. Also, store them when they are completely cooled.
When reheating the waffles, you can warm them up from frozen. Set them in a preheated oven set to 200°F. If they are really soggy, you can set the oven to 300°F for 5 – 10 minutes.
Adding sugar to your waffle recipe will also help them be crispy.


Can you put chocolate chips in waffle maker? Yes, you can!
Belgian Waffles with Yeast
I like using dry yeast when baking chocolate chip waffles. Dry yeast is the dehydrated form of Baker’s yeast. It doesn’t require refrigeration, enhances texture, and adds to the flavor.
Blueberry Belgian Waffles
If chocolate isn’t your thing, you can make them plain or make half chocolate waffles and the other half without. Or make half chocolate chip and half blueberry. Or make them all blueberry. Consider the waffle batter a blank slate for you enjoy as you wish!
To make blueberry Belgian waffles, add ½ – ¾ cups of blueberries. Slightly smash them with a fork before putting them in the waffle batter.
Easy Chocolate Chip Waffle Recipe
I love making this waffle batter recipe in advance for when I’m having out of town family come for a visit. Everyone loves them, and they seem very special. No one in my extended family makes waffles from scratch anymore so they are a real treat.
As busy moms and dads and grandmas and grandpas, it’s nice to have this make-ahead waffle batter you can pull out for the weekend when you have time to enjoy breakfast with the kiddos. Make the batter and keep it sealed overnight in the refrigerator to use the next day.
Buying a Waffle Maker
Buying a waffle maker was a game changer. It was a big decision because at the time, I wasn’t baking from scratch like I am now. I splurged and bought the double waffle maker instead of the single maker because I wanted to make them in half the time. The footprint of the appliance is the same with one or two irons. The waffle maker with two irons is only a bit taller.
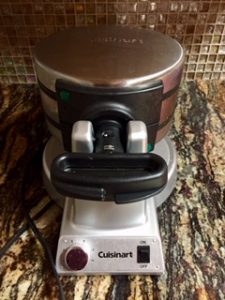
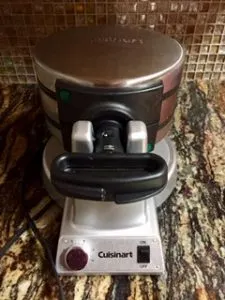
My Cuisinart Belgian waffle maker double iron
Of the 23 times I made them, three times I made double batches of the recipe below. I started keeping a tally because I wanted to justify buying it. (When I bought my bread maker, I started a tally as well.)
I bought the following from Amazon and like them all:
Cuisinart WAF-F20 Double Belgian Waffle Maker, Stainless Steel
It seems it’s been replaced with a new model – Cuisinart WAF-F40 Double Flip Belgian Waffle Maker. The double iron is more expensive. However, for the time savings and that it wasn’t taking up more room on my counter, I chose it. I’m glad I did.
The waffle maker came with a measuring scoop which is very useful so you know how much batter to pour.
Small OXO Good Grips Silicone Basting & Pastry Brush
When I was looking at reviews, some people recommended this pastry brush. I love all the kitchen OXO products I have. The pastry brush helps to coat the waffle irons with oil before pouring in the batter. I don’t use spray cans but if you do, you won’t need a pastry brush.
Norpro Grip-EZ Grab and Lift Silicone Tongs
I really like these Norpro silicone tongs that someone recommended but any tongs will probably work fine too. These tongs help remove the waffle without breaking the crispy exterior.
Cooling racks
Cooling racks are the secret to making crispy waffles. I already had cooling racks (that I bought at my grocery store). If you don’t, it helps to have at least one when you make homemade waffles. Otherwise, they can become soggy.
I have three cooling racks and set them out before making waffles. When I remove the waffles from the iron, I immediately set them on the racks. When I run out of room, I take the waffles that I made first and stack them. They remain crispy because they won’t have the steam the produces moisture.
If I’m serving the waffles right away, I set the cooling racks in the oven with the oven turned to warm.
FAQs
What’s the difference between a Belgium waffle and a regular waffle?
Belgium waffles are thicker and fluffier than regular waffles. They have a crispy outside and a moist and fluffy inside. They are made with yeast instead of baking powder. Many recipes also require you to use an extra egg white.
What is the secret to making crispy waffles?
The secret to making crisp waffles: a hot waffle iron and a touch of sugar in the batter. The sizzling iron ensures a golden exterior while sugar, a caramelizer, give the waffle with its iconic crunch. It’s also essential to put the waffles on a cooling rack so they don’t build up condensation.
Why won’t my waffles get crispy?
Your waffles may not get crispy if the waffle iron isn’t hot enough; if you didn’t let the batter rest; or if you don’t have enough sugar in the batter. To crisp them up, set them in a preheated oven at 300°F for 5 – 10 minutes.
What to put on waffles when out of syrup?
When you are out of syrup, you can use many other toppings for waffles. Consider drizzling melted butter or honey and a sprinkling of cinnamon sugar. You can also powder them with confectioners sugar.
Another option is to top waffles with whipped cream and sliced strawberries and/or blueberries. You can also slather on orange marmalade, cherry preserves, or strawberry jelly.
Get creative! Waffles are the perfect backdrop for lots of sweet toppings.
Is there a difference between pancake and waffle batter?
Yes, there is a difference between pancake and waffle batter. They are similar as both use flour, sugar, eggs, and milk. Waffle batter also has melted butter and/or oil. Along with the sugar, these ingredients give waffles their distinctive crisp and airy structure.
Should you let waffle batter rest?
Yes, definitely let waffle batter rest. A minimum of 15 – 30 minutes of rest time allows gluten strands to relax and baking powder to fully activate. If you are making a yeast waffle batter, let the batter rest for an hour, stirring every 15 minutes.
What can I add to waffle mix to make it better?
One way to make waffle mix better is to add a tablespoon or two of pure vanilla extract. You can also add a teaspoon of cinnamon and/or half a teaspoon of nutmeg. Add chocolate chips, smashed blueberries, or a tablespoon of maple syrup. You can also use real butter to coat the waffle irons instead of a tasteless oil.
What happens if you add an extra egg to waffles?
Adding an extra egg to waffles helps the waffles have more structure and richness.
How do I keep my waffles crispy for a crowd?
To ensure your waffles maintain their crispiness, set them to cool on a wire cooling rack after baking. This prevents the steam from making them soggy. Before you are ready to serve them, set them in a preheated oven at 200°F.
How do you keep waffles crispy for brunch?
To keep waffles their crispy best for brunch, cool them on a wire cooling rack after baking them. This lets the steam escape. Then set them in the oven on the warm setting or at 200°F until you want to serve them.
What is the difference between a waffle and a Belgian waffle?
Appearance-wise, regular waffles tend to be thinner and smaller square pockets while Belgian waffles are taller with deeper square pockets. The deep pockets are easier to fill with syrup, melted butter, honey, etc. Belgian waffle recipes usually contain yeast whereas regular waffles are leavened with baking powder and/or baking soda.
Why are my Belgian waffles not crispy?
Your Belgian waffles may not be crispy if the waffle iron isn’t hot enough, if the batter is too runny, if you didn’t add sugar to the recipe, or if you stacked the waffles after removing them from the waffle iron.
Why do Belgian waffles taste so good?
Break-apart light crispiness with a touch of sweetness. Belgian waffles are delectable. Made with yeast, real butter, whole milk, and eggs, their texture is fluffy and dense at the same time.
Can you use a regular waffle maker to make Belgian waffles?
Yes, you can use a regular waffle maker to make Belgian waffles. They won’t be as tall with deep pockets but otherwise will be delicious.
This is the Best Chocolate Chip Waffle Recipe
I think this is the best chocolate chip waffle recipe. I’ve made them almost two dozen times. My family enjoys them for breakfast, brunch, dessert, and as snacks. I often have some in the freezer; they are easy to take out and reheat. They always come out crispy.
Whether you are an experienced baker or new, try this recipe. Before I starting baking everything from scratch, I wasn’t someone to whip up waffles, fluffy pancakes, make homemade cinnamon rolls, or make breakfast frittata muffins. I was a frozen waffle, toast, pancake mix type of person. But it’s so doable to make these waffles from scratch.
Learn more palm oil free breakfast ideas. I appreciate you reading and being interesting in palm oil free recipes you can make at home. Once you get in the habit of baking, it makes it easier to reduce reliance on frozen waffles and other processed foods. Enjoy!
Here’s some inspiration for other things to bake. I just made some delicious mini chocolate chip muffins.


Chocolate Chip Waffles
Equipment
- Waffle iron or waffle maker
- Small bowl to melt butter in microwave or saucepan to melt on stovetop
- Measuring cup for water and yeast and to scoop batter
- Food thermometer
- 1 large bowl for flour
- 1 medium or large bowl for liquid ingredients
- Mixing spoon and/or hand mixer
- Measuring spoons
- Brush to grease waffle iron
- Tongs
- Cooling racks
Ingredients
- 1½ cups water - divide
- 2¼ teaspoon active dry yeast - one pack
- 3 cups all-purpose flour
- ¼ teaspoon salt
- 4 large eggs
- ⅓ cup granulated sugar
- 1 ½ cups whole milk
- 1 stick of butter
- 2 teaspoons pure vanilla extract
- 2 teaspoons tasteless vegetable oil
- ⅛ teaspoon oil to grease waffle iron
- ¾ cup real chocolate chips
Instructions
- Melt butter in small dish, and cool on counter.
- Put 6 oz water in microwave safe cup and microwave for 30 seconds or until water reaches 105 - 110°F (40 - 45°C). Measure with food thermometer.
- Add yeast and a pinch of sugar to the heated water. Gently stir, and set aside until foamy (5 - 10 minutes).
- In large bowl, combine flour and salt. Set aside.
- In a separate bowl, add the eggs and sugar. Pour in the yeast mixture which should be foamy. Stir to combine.
- Add the remaining 6 oz of water, milk, avocado oil, melted butter, vanilla extract, and chocolate chips to the egg mixture. Combine until smooth.
- Pour the liquid mixture into the flour mixture. Gently combine until the batter is smooth.
- Let the batter rest for 60 minutes. Gently stir it every 15 minutes.
- After 45 - 50 minutes, turn on the waffle maker. I set my maker to setting #4.
- When preheated, pour just under a ⅛ teaspoon oil on the waffle iron. Coat the top and bottom irons. Repeat if you have a 2-iron waffle maker.
- Use the scoop your waffle maker came with, and fill to the line. If it didn't come with one, scoop approx ¾ cup of batter. Close the lid. If you have a second waffle iron, rotate the waffle maker 180°F and fill the other well with batter. Rotate the maker again 180°.
- Wait until the indicator light beeps, and open the lid. With tongs gently remove the waffle, and place on cooling rack.
- If you are serving waffles soon, preheat your oven to 200°F or on the Warm setting. Place waffles on a cookie sheet after they have released steam on the cooling rack. Preferred: If you have a cooling rack, set it on the cookie sheet and set the waffles on them.
- Repeat steps 11 - 13 to use all the batter.
Notes
- THIS IS KEY: Set freshly-made waffles on a cooling rack so they stay crispy. If you stack them, they will become moist and soggy.
- To make the batter ahead of time, cover, and put in refrigerator overnight. Make the next day. Gently mix before using.
- Pour the batter in the middle of the waffle iron so it spreads out evenly.
- If you freeze waffles, put them in the back or bottom of your freezer to avoid temperature fluctuations.